

Guidance Notes for MIGRATING Multi-Tenant Data
These notes are intended to provide a step-by-step guide on how to use Precision Bridge to migrate multi-tenant data from BMC Remedy platforms to ServiceNow.
To migrate data between ServiceNow instances, see our Instance Migrator page.
To migrate data from Salesforce to ServiceNow, see our Salesforce Migrator page.
To migrate data from Atlassian Jira to ServiceNow, see our Jira Migrator page.
To migrate data from RSA Archer to ServiceNow, see our Archer Migrator page.
To migrate data from database platforms to ServiceNow see our Database Migrator page
Scope
Managed Service Providers (MSPs) and other customers who have multi-tenant operations need to be able to migrate data to Service Now whilst maintaining data separation by tenant (company). It is a firm requirement that post-migration, a given company's data is not visible to users defined in other companies.
Introduction
Service Now includes the concept of Domain Separation. All tables can be made domain-aware by adding the sys_domain field to the table. From Jakarta onwards, the OOTB tables of Service Now already include this field for all tables that are required to be domain separated; therefore there should be no need to add this field to any OOTB table. If any custom tables are to be included in the migration, you may need to ensure the sys_domain field is added to these tables.
The domain for a given record (where the table supports domain separation) is set when the record is inserted, and cannot be subsequently changed. The domain set on the record will be the same as the domain of the user creating the entry.
Pre-Requisites
All Precision Bridge Projects used for multi-tenant migrations should support the ability to restrict the set of source records to those relating to a given company. Each Form mapping must either:
Explicitly contain a Source Filter condition that restricts the source record set to a named company, where the company name is given by an Execution Variable.
Have an Inclusion Filter defined, where the set of included parent records is itself restricted to records for a given company.
Note: All BMC Remedy -> Service Now migration templates for Precision Bridge available for download from this site already satisfy the above conditions.
implementation Notes
Warning: We recommend that you use this migration tool on a non-production instance for first use. If using with a production instance we recommend that you take a full back-up of all data prior to migration. In the unlikely event that you need to restore to a pre-migration state, you should have a reliable data backup to restore from.
Data should be migrated one company at a time. For each company, the following needs to be created on the target instance:
A Domain specific to this company.
An Administrator User for this domain.
Step 1: Creating the Domain Entry:
Connect to the target Service Now instance as System Administrator
Navigate to Domain Admin -> Domains
Click ‘New’
Enter the following field values:
Name: Name of the company whose data you are migrating
Type: MSP
Parent: TOP
Description: (optional) Users can access global records and those for <company name>
Click ‘Submit’
Step 2: Creating the Domain Administrator User:
Connect to Service Now instance as System Administrator
Navigate to System Security -> Users and Groups ->Users
Click ‘New’
Enter the following field values:
User ID: <Company Name>.admin
First Name: <Company Name>
Last Name: Admin
Managed Domain: checked
Password: define as appropriate
Domain: Select the domain created for this company
Click ‘Submit’
In the list of users, select the user just created
Click on the ‘Roles’ tab at the bottom of the page
Click ‘Edit’
Select the ‘admin’ role
Click ‘Save’
Step 3: Validation Check:
Now confirm that you are able to log on using this user id/password and that domain separation is operating correctly:
From the System Administrator menu (top right) select ‘Impersonate User’
Select the domain administrator user created for this company
If other domain separated companies already exist, check this user cannot see their data by:
Navigate to Organization -> Companies
Confirm that you cannot see listed any existing domain separated companies.
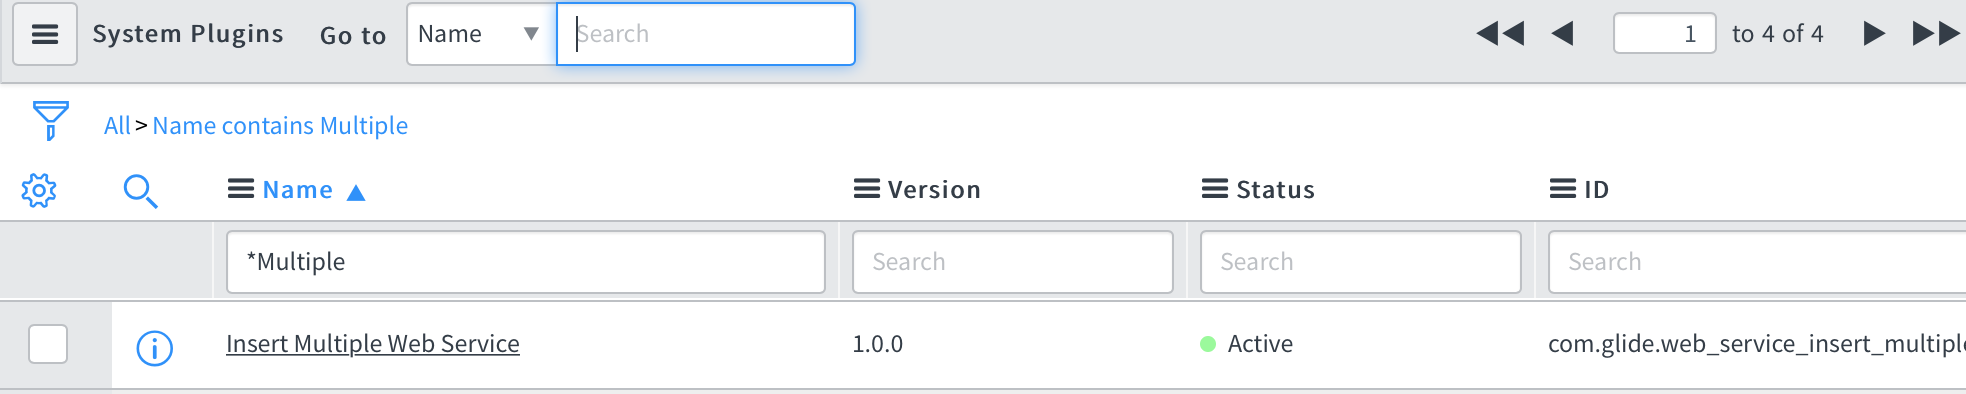
Step 4: Activate the 'Insert Multiple Web Service' Plugin on your instance if not already active. This will improve the performance of the data migrations for large data sets.
Step 5: Check that you have the latest version of Java installed on your local machine; you can download the latest version from here: https://www.java.com
Step 6: If not already present, install, launch and license Precision Bridge on your local machine or on your source Remedy server; Download from here
Step 7: Migrate Foundation Data for selected company:
WARNING: Once records have been migrated, their domain cannot be changed without deleting the records (a manual task) and running the migration again.
Any mistakes in setting up the target domain and user may result in the data being migrated to the wrong domain, and potentially allow users operating in other company specific domains access to these records.
Therefore it is very important that prior to migrating ANY records, you make doubly sure that the correct company is specified in the Execution Variables for the Precision Bridge project and that the target user being used for migrating the data is restricted to the domain defined for this company. Never use the global ‘admin’ user to migrate records – this will place the records in the ‘global’ domain, visible to all users.
To run the migration for the foundation data for this company, perform the following actions
Open Precision Bridge
Select File->New Project from Template->Remedy-ServiceNow->Foundation(Full)

This project setup/authentication screen should now appear:
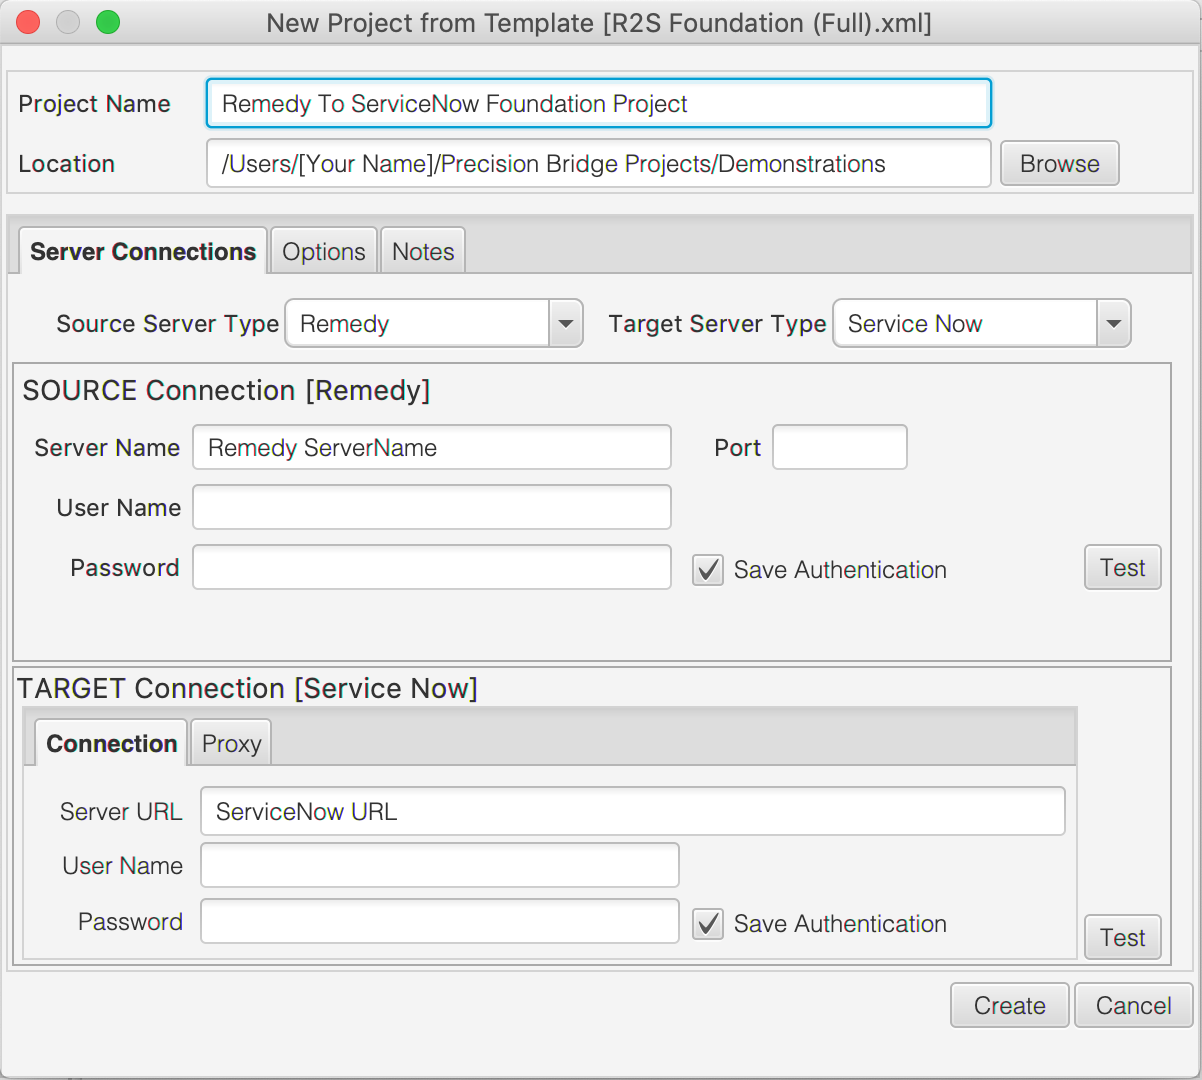
Name the project <Company Name>_Foundation
Set the project location as appropriate.
Source Server: Enter the connection details for the Remedy server (must be an administrator user)
Target Server: Enter the connection details for the Service Now server. Use the domain administrator user for the company whose data you are going to migrate (<Company Name>.admin as created in Step 2 above), DO NOT use the global ‘admin’ user.
You can elect to ‘Save Authentication’ for source and target server. This will save the encrypted username and password in a separate file on the client machine.
Click ‘OK’
Once the project has opened, select Project->View Mappings List to review the data mappings and disable any that you don't need.

Open any form mapping from the list to review the field mappings to confirm that they meet your requirements
When ready to start the migration, select Project->Execute
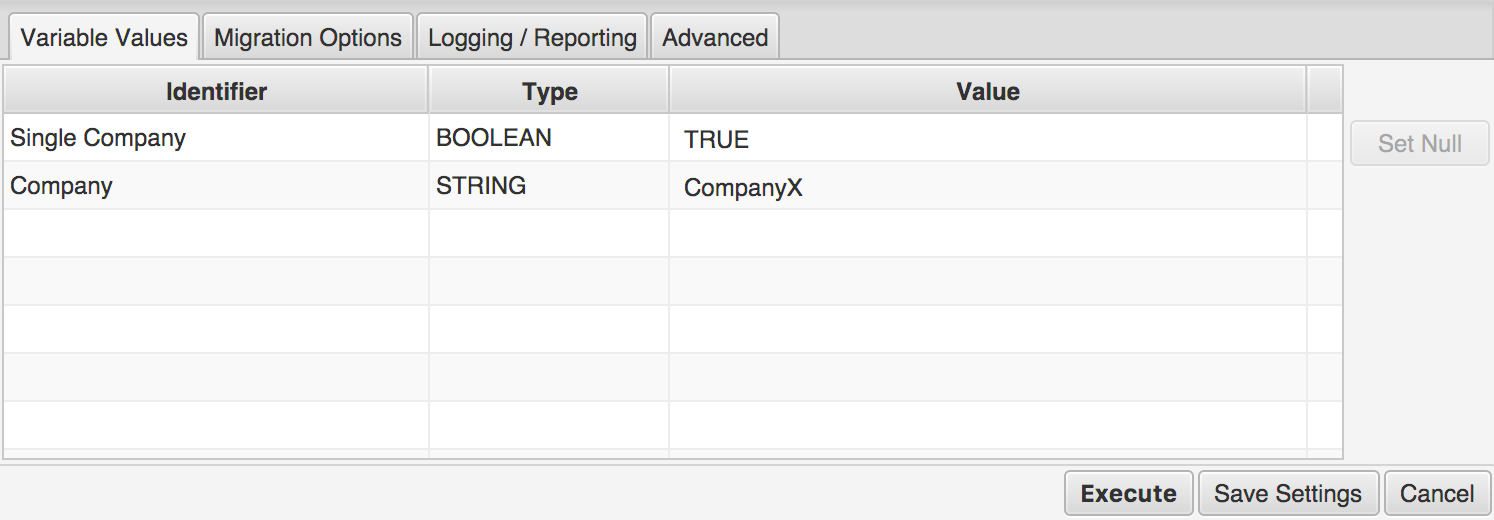
In the Project Variables tab, enter the following values for the variables:
Company: <Company Name> note this must exactly match the name of the company on the source server (case sensitive)
Single Company: TRUE
Review the settings on in the ‘Logging / Reporting’ tab. You may elect to report the outcome of all migrated records, or just those that return an error or warning.
Click ‘Execute’ to run the migration and wait for it to complete
Step 9: Post Execution Checks
If any errors are reported in the log, or migration report, these should be followed up on. The project can be re-run if necessary.
Confirm that domain restricted users outside this company’s domain cannot see records for this company.
To migrate the foundation data for a different company, repeat steps 1 - 9
To migrate other application data for the same company, download the corresponding migration template, then repeat steps 8 and 9 above. In each case, the domain administrator user for the corresponding company must be used.
For more information or assistance contact info@precisionbridge.net